Selecting the Print Driver and Finishing
After selecting the queue type of the printer, the next step in adding a printer is to select the print driver.
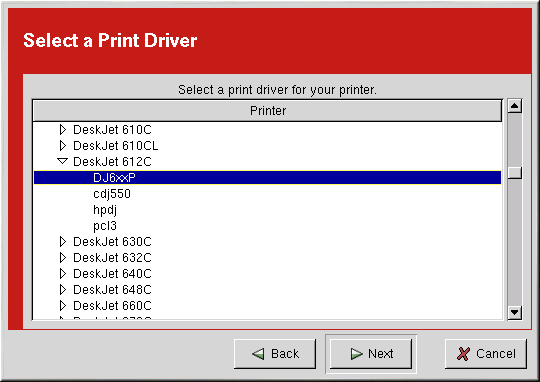
You will see a window similar to Figure 21-13. If you are configuring a local printer, select the print driver from the list. The printers are divided by manufacturers. Click the arrow beside the manufacturer for your printer. Find your printer from the expanded list, and click the arrow beside the printer name. A list of drivers for your printer will appear. Select one.
 | Tip |
|---|---|
To learn more about the print drivers, go to http://www.linuxprinting.org/printer_list.cgi. |
| Tip |
|---|---|
You can select a different print driver after adding a printer by starting printconf, selecting the printer from the list, clicking Edit, clicking the Driver tab, selecting a different print driver, and applying the changes. |
As shown in Figure 21-14, the print driver processes the data that you want to print into a format the printer can understand. Since a local printer is attached directly to your computer, you need to select a print driver to process the data that is sent to the printer.

If you are configuring a remote printer (LPD, SMB, or NCP), the remote print server usually has its own print driver. If you select an additional print driver on your local computer, the data will be filtered more than once, and the data will be converted to a format that the printer can not understand.
To make sure the data is not filtered more than once, first try selecting Raw Print Queue or Postscript Printer if you are configuring a remote printer. After applying the changes, print a test page to test this configuration. If the test fails, the remote print server might not have a print driver configured. Try selecting a print driver according to the manufacturer and model of the remote printer, applying the changes, and printing a test page.

Confirming Printer Configuration
The last step is to confirm your printer configuration. Click Finish if this is the printer that you want to add. Click Back to modify the printer configuration.
Click the Apply button in the main window to save your changes to the /etc/printcap configuration file and restart the printer daemon (lpd). After applying the changes, print a test page to ensure the configuration is correct. Refer to the Section called Printing a Test Page for details.
If you need to print characters beyond the basic ASCII set (including those used for languages such as Japanese), you need to go to your driver options and select Prerender Postscript. Refer to the Section called Modifying Existing Printers for details. You can also configure options such as paper size if you edit the print queue after adding it.