Adding a Remote UNIX Printer
To add a remote UNIX printer, such as one attached to a different Linux system on the same network, click the New button in the main Printer Configuration Tool window. The window shown in Figure 26-2 will appear. Click Next to proceed.
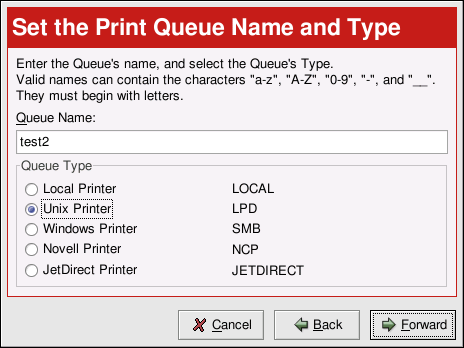
You will then see the screen shown in Figure 26-5. Enter a unique name for the printer in the Queue Name text field. The printer name cannot contain spaces and must begin with a letter a through z or A through Z. The valid characters are a through z, A through Z, 0 through 9, -, and _.
Select Unix Printer from the Queue Type menu, and click Next.
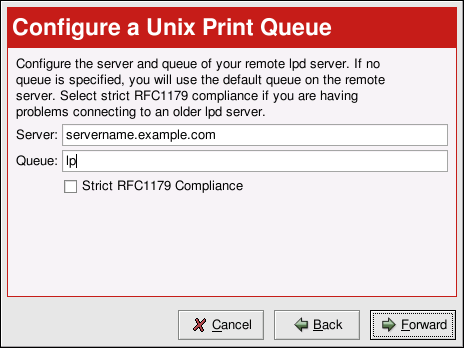
Text fields for the following options appears as shown in Figure 26-6:
Server — The hostname or IP address of the remote machine to which the printer is attached.
Queue — The remote printer queue. The default printer queue is usually lp.
By default, the Strict RFC1179 Compliance option is not chosen. If you are having problems printing to a non-Linux lpd queue, choose this option to disable enhanced LPRng printing features.
Click Next to continue.
The next step is to select the type of printer that is connected to the remote system. Skip to the Section called Selecting the Print Driver and Finishing to continue.
 | Important |
|---|---|
The remote machine must be configured to allow the local machine to print on the desired queue. As root, create the file /etc/hosts.lpd on the remote machine to which the printer is attached. On separate lines in the file, add the IP address or hostname of each machine which should have printing privileges. |